Monday, February 20, 2012

Rice pudding ice cream


I was a picky eater as a child. Anything that was exotic would always get passed over. I'd only eat plain, bland foods and desserts. My pickiness carried over to most of the foods my Puerto Rican grandmother cooked. I could throw down with some of her fried pork chops (chuletas), beef stew (carne guisada), and rice (but no beans, please). But, no way was I going anywhere near the fried plantains (tostones), cassava (yuca), tamales, and, especially, rice pudding with offending raisins (arroz con leche or arroz con dulce). I know, for shame...

I have finally stepped out of my picky shell and am definitely making up for lost time! While I still won't go anywhere near those tamales, I love me some rice pudding. I only make it once a year or so because I do it up old school style, which means standing in front of the stove, stirring, for hours. I prefer my rice pudding fairly simple with only a generous sprinkle of cinnamon. Oh, and I add raisins now. Tara, on the other hand, likes it plain. Oh, the irony...


When I saw a recipe for rice pudding ice cream from clumsycookie, I knew I had to get on it. I mean, can you imagine, rice pudding in ice cream form?! I won't be sharing a rice pudding recipe with you today because: Hello? Hours at the stove is just not cute right now.  Use your tried and true version or, do like I did and use some Kozy Shack rice pudding and doctor it up as you like.  The ingredients are fairly minimal and what you'd expect in a homemade rice pudding. You know, things like rice, milk, eggs, and sugar.

Unfortunately, rice pudding seems to be better as rice pudding rather than rice pudding ice cream. It might have been because I left it plain and didn't add anything to the store-bought stuff. So definitely make your rice pudding how you like it flavored and then amp up the flavors a bit, otherwise it will be rather bland...


Rice Pudding Ice Cream
Barely adapted from Clumbsy Cookie

If you don't have glucose or corn syrup, you can substitute with 4 tablespoons of regular sugar. I have not tried this, so let me know how it works if you do.

Ingredients

1 cup milk
3 tablespoons glucose or corn syrup
2 cups rice pudding

Optional add-ins (if using store-bought rice pudding):
1+ teaspoon cinnamon
1/2 cup raisins soaked in rum or vodka

Directions

Mix the milk and glucose (or corn syrup or sugar) and heat just to dissolve the glucose. Combine with the rice pudding and cinnamon, if using, in a blender and mix until you have a thick liquid (you could also use an immersion blender).  Strain to separate any unblended rice grains (these are quite tasty - like a sweet rice cereal).  Cool completely and churn in your ice cream maker according to the manufacturers instructions.  Mix in the raisins, if using, just before you transfer the ice cream into a container to freeze.

Monday, February 13, 2012

Shortbread


I recently discovered shortbread (I know, what rock have I been living under?) and only because I was looking for prepared cookies with minimal ingredients and none of the "bad" stuff like high-fructose corn syrup, soybean oil, emulsifiers, etc.  I am always intrigued at how they can taste so good.  And their texture is amazing - they're soft without being too soft and chewy like a traditional cookie, but they also have a slight snap and, yet, aren't crispy.  To satisfy my fix, I buy Walker's Shortbread, but they're kind of expensive.  While they're worth the price, I knew that I could make some at home for much cheaper.  


These shortbread cookies have all of 3 ingredients: flour, sugar, and butter.  You almost can't go wrong with these.  That said, the first time I attempted shortbread cookies, they tasted really good, but they spread all over the baking sheet.  I was still very much a beginner baker at the time and thought that the problem was with the recipe or that the simplicity of the recipe belied some serious skills needed.  Turns out, the dough just needed to be chilled.  Lesson learned.  

I originally wanted to dress them up by dipping the ends in white chocolate and then covering that with some chopped pistachios, but the results were rather disappointing and boring.  All the individual flavors were lost.  So, word to the wise, these are best enjoyed plain.


Shortbread
Barely adapted from Better Homes & Gardens, 75th Anniversary Ed.

I used regular grocery store butter, but I bet that some fancy butter would really shine in this recipe. 

Ingredients

1 1/4 cups all-purpose flour
3 tablespoons granulate sugar
1/2 cup butter, cold*

Directions

Combine flour and sugar in a bowl or food processor.  If mixing by hand, cut in butter using a pastry blender or two forks.  If using a food processor, add the butter and pulse.  Whatever method you use, combine ingredients until mixture resembles fine crumbs and starts to stick together a bit. Form the mixture into a ball and knead until smooth.

On a lightly floured surface, roll the dough into an 8x6-inch rectangle (Get out that ruler to be completely accurate!) that is about 1/2-inch thick.  Using a knife or dough scraper, cut the dough into 24 2x1-inch strips.  Place 1 inch apart on an ungreased baking sheet.  If desired, make the "design" on the cookies by gently pressing the flat end of a wooden skewer or a fork into the dough, taking care not to press all the way through the dough.

If your kitchen or dough is particularly warm, a short 20-30 min chill in the fridge or freezer is super helpful and will make sure that your cookies retain their shape. (I like to put my dough in the fridge, then turn on the oven to preheat.  When the oven is ready, I'll pop the baking sheets straight from the fridge into the oven.)

Preheat oven to 325F.  Bake for 20-25 minutes or until the cookies turn a very light brown.


Notes: When the type of butter isn't specified, I usually use a mix of salted and unsalted.

Tuesday, January 17, 2012

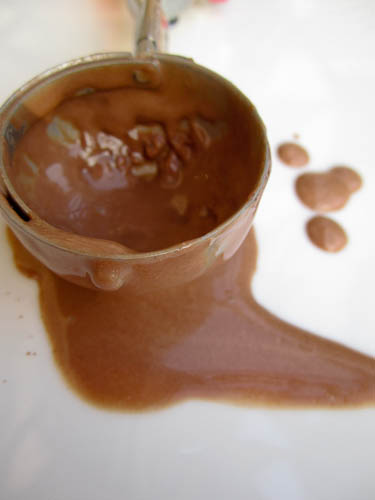
Chocolate ice cream


Confession: I generally dislike most chocolate desserts.

Of course, now you all are looking at me like I'm some sort of weird, possibly non-human, definitely non-female thing.


Honestly, I have no big explanation; it just doesn't do anything for me.  Rarely will I pick up a chocolate creation as my first, or even second, choice for a dessert item.  There are a few chocolate desserts that I will eat without hesitation like chocolate chip cookies (because, well, they're chocolate chip cookies) and fudgey (but never cakey and always without mix-ins, thankyouverymuch) brownies.


There are things I won't touch no matter how desperate I am, like fudge and dark chocolate.

Everything else pretty much falls into the "only if I'm really craving something sweet and there is absolutely no alternative" category.  Chocolate ice cream usually falls into this group.


You may be wondering then, why I decided to make a chocolate ice cream to showcase on the blog.  Well, Tara asked and I'm always up for a challenge.  That said, I was still a little hesitant to make it, but I figured that if I didn't like it, I would certainly be able to give it away to someone.  Plus, I had planned to make it for Christmas and pair it with some peppermint meringues (and we all see how that went...)


David Lebovitz, who I got this recipe from, says this is his ultimate chocolate homemade ice cream.  I can certainly see why, as it just may nudge chocolate ice cream into something I like...on purpose.  In other words, if I, a non-chocolate lover, like this, you should jump on it!


Chocolate Ice Cream
from David Lebovitz’s The Perfect Scoop

A note about the cocoa powder.  Don't stress if you only have regular (unsweetened cocoa powder); I wasn't able to find any Dutch-processed cocoa powder anywhere and didn't want to order any online.  I'm sure it affects the flavor a bit - I thought it was a smidge acidic - but it's still quite delicious.

Ingredients

2 cups (500 mL) heavy cream, divided
3 tablespoons (21 g) unsweetened Dutch-process cocoa powder
5 ounces (140 g) bittersweet or semisweet chocolate, chopped
1 cup (250 mL) whole milk
¾ cup (150 g) granulated sugar
Pinch of salt
5 large egg yolks
½ teaspoon vanilla extract

Directions

Bring 1 cup (250 mL) of the cream and cocoa powder to a boil, whisking to fully incorporate the cocoa while heating. Immediately reduce the heat and simmer for 30 seconds, whisking constantly. Remove from the heat and stir in the chopped chocolate until smooth. Stir in the rest of the cream. Pour the liquid into a bowl, making sure to scrape all of that chocolatey goodness out (Did I just say that?!).  Place a mesh strainer on top of the bowl.

Heat the milk, sugar, and salt in the same saucepan you used above. While that is heating, whisk the egg yolks in another bowl. Temper the egg yolks by slowly pouring the warm milk mixture into the egg yolks, whisking constantly. (I like to do this a bit slower by pouring some of the liquid into the eggs by the ladle-full about 2-3 times and then pouring the rest of the milk mixture into the bowl.)  Pour the warm egg-milk mixture back into the saucepan.

Continue heating the mixture over medium heat while stirring constantly with a wooden spoon (or other heatproof utensil), scraping the bottom as you go, until the mixture thickens and coats the spoon (170°F on an instant-read thermometer). Pour the custard through the strainer and stir it into the chocolate mixture until fully incorporated, then stir in the vanilla.

Chill the mixture thoroughly in the refrigerator, preferably overnight, then freeze it in your ice cream maker according to the manufacturer’s instructions.


Thursday, January 12, 2012

Nutmeg Ice Cream


I made this ice cream before Christmas to accompany the Eggnog cookies.  Unfortunately, their flavor profiles were so similar, that there wasn't much of a difference in how they tasted.  I had to mentally smack myself in the forehead for thinking that nutmeg custard (read: egg-based) ice cream would be much different from eggnog cookies with nutmeg.

Oh well, you live and learn, right? 

In any event, I liked the ice cream well enough, but felt that it needed more flavor.  The nutmeg flavor just wasn't strong enough.  The nutmeg only imparted a light, oddly floral note that is almost lost in the richness of the custard base.  This has got to be due to the extremely short steeping time.  When I was reviewing the recipe, I thought it was odd that it called for steeping the nutmeg for only 10 minutes. Any other recipe I've seen that requires steeping says to do so for about an hour.  I've adjusted the time in the recipe, but know that I didn't actually steep for that long, so maybe check your base at 30 minutes or so.   

Final bit of advice: normally, I suggest an overnight chill in the fridge for custard bases, but here, it is required.  It's absolutely crucial to developing the full flavor of the nutmeg.


Nutmeg Ice Cream
Adapted from Saveur

Yield: About 1 Quart


To easily crack the nutmeg, either use a nutcracker or place the nutmeg in a plastic bag and smash it with a hammer or a rolling pin.  Don't just bang it with your rolling pin on the counter because the nutmeg will shatter everywhere, not that I did any such thing (ahem).

Ingredients

2 cups half-and-half
1 whole nutmeg, cracked
2 tsp. freshly grated nutmeg
 3/4 cup sugar
6 egg yolks
1 cup heavy cream


Directions

Heat half-and-half and cracked nutmeg in a 4-qt. saucepan until it just begins to simmer. Remove from heat; let steep for 10 minutes (at least - see liner notes above).

While the cracked nutmeg is steeping, toast grated nutmeg in a skillet over medium heat, 1–2 minutes. (This is optional.  It adds a somewhat floral essence to the nutmeg.)  Remove pan from heat; set aside.

In a bowl, whisk together sugar and yolks. Then, still whisking, slowly pour in half-and-half mixture. Return mixture to pan; cook, stirring, until mixture thickens, 8–10 minutes. Pour through a fine strainer into a large bowl or measuring cup (which is what I always do). Whisk in toasted nutmeg and cream; cover custard and chill in the fridge overnight.

Freeze custard according to manufacturers instructions.

Monday, January 9, 2012

Eggnog cookies


I know, I know!  The holidays are over and here I am posting not only a cookie recipe, but an eggnog cookie recipe.  I have some nerve don't I?  Well, hello, this is a dessert blog.  Surely you expected nothing less...

In my defense, I made these before Christmas and am just now getting around to posting. However, there is always room for cookies and my local stores still have eggnog stocked so you still have time.  Otherwise, you can tuck this recipe away until eggnog season rolls around again...  


On their own, these cookies are essentially a sugar cookie with an eggnog aftertaste.  The eggnog flavor kind of sneaks up on you after you've taken a few chews.  The icing definitely brings the eggnog flavor.  They are exactly what you, or at least what I, want in a sugar cookie: slightly crispy on the edges and soft and chewy in the middle.  I particularly liked how they got chewier each day.

A note about piping the icing, despite how cool the pictures of the iced cookies look, I would definitely change my technique if I make these cookies again.  First, I used a plastic baggie and cut the opening too big. Smaller is better here, folks.  Second, I should have separated the cookies before the icing set/dried because I had all these little tails of icing hanging off the cookies once I separated them.  (It was actually kind of cute. And the dogs appreciated when the little pieces kept falling on the floor.  You know, on accident...ahem...)  Finally, in light of the icing tails, it might have been easier, and definitely would have been prettier, to do swirls on all the cookies.       


Iced eggnog cookies
Adapted from Cookie Madness

Yield: 6 dozen small cookies; 1.5 cups icing


Ingredients

Cookie dough
2 1/4 cups flour
1 teaspoon baking powder
1/2 teaspoon cinnamon
1 teaspoon freshly grated nutmeg (or 1/2 teaspoon pre-ground)
1 1/4 cups sugar
3/4 cup SALTED butter, room temp
1/2 cup eggnog
1 teaspoon vanilla
2 egg yolks
1 tablespoon nutmeg (optional)*

Eggnog icing
3 C. confectioners’ sugar
1/4 C. softened butter
1/3 C. commercial eggnog (use as much as you need)

Directions

Preheat oven to 300F.

In a medium bowl combine flour, baking powder, cinnamon and nutmeg; mix well with a wire whisk and set aside.

In a large bowl, cream sugar and butter with an electric mixer. Add eggnog, vanilla and egg yolks and beat at medium speed until smooth. Add the dry ingredients and beat at low speed just until combined.

Drop by rounded teaspoons onto ungreased baking sheets, 1″ apart. Sprinkle lightly with nutmeg or skip this step and sprinkle on the nutmeg after you ice the cookies. Bake for 23-25 minutes or until bottoms turn light brown.

While the cookies are baking, make the icing:  In small mixer bowl, beat confectioners’ sugar and butter until well blended. Gradually beat in eggnog until icing is smooth.

Transfer to cool, flat surface immediately with spatula.  Ice the cookies after they are completely cool.

*Note:
I didn't top the cookies with nutmeg because I was intending to pair them with nutmeg ice cream and I didn't want the flavor to over power everything.  However, if you're eating them on their own, the nutmeg topping is highly recommended.