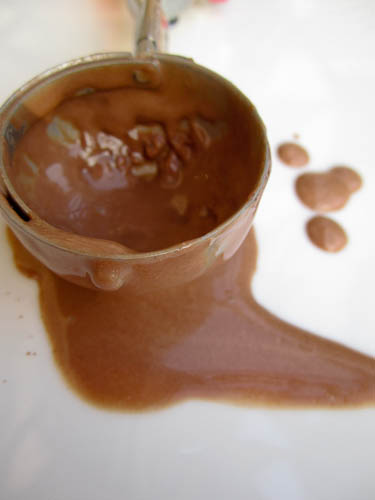
I haven't posted in forever, so I'm a bit rusty. Many apologies.
Last weekend, I vended at Big Bang Bazaar in Maitland, FL. It was my first time selling in several months and it was quite successful! So successful, in fact, that I'll be looking for more events to vend at. I sold several cookie flavors, peanut butter chocolate cookie truffles, and candied bacon. Yup, I said bacon. I made "plain" candied bacon, salted chocolate coated, and peppered white chocolate coated. The chocolate coated bacon pieces were gone within a few hours. They were so popular that I've decided to add them to my menu of treat offerings.
5 pieces of "plain" candied bacon is $12 and 5 pieces of chocolate covered bacon are $15. Shipping is not included.
Place your orders now!
*****
I will be posting information on upcoming cookies for sale.
Wednesday, March 27, 2013
Friday, June 8, 2012
Crazy flavor combos
When I was checking out Schmackary's, the other thing that jumped out at me was the notion that his cookies were so popular because of the crazy flavors (peep the menu). While his cookie flavors are more adventurous than your average chocolate chip, they definitely aren't that crazy.
Case in point, last week, I sent out a shipment for the Scoops of Sunshine Cookie Club with chocolate rhubarb Parmesan and walnut cardamom with pistachio brittle. And this week, I was recipe developing for corn and sun-dried tomatoes and corn and strawberry. Now, if you ask me, those are some crazy flavors.
Fuzzy iPhone pics of cookie dough:
Case in point, last week, I sent out a shipment for the Scoops of Sunshine Cookie Club with chocolate rhubarb Parmesan and walnut cardamom with pistachio brittle. And this week, I was recipe developing for corn and sun-dried tomatoes and corn and strawberry. Now, if you ask me, those are some crazy flavors.
Fuzzy iPhone pics of cookie dough:
Chocolate with rhubarb and Parmesan
Walnut with cardamom and pistachio brittle
~ Sunshine
Friday, June 1, 2012
A cookie shop
I recently read about a newly-opened cookie shop in NYC, called Schmackary's. I was super interested in the owner's story because his path is one that I hope to follow to some extent. I'm not sure on the specifics, but it goes something like this: He baked cookies and passed them out to friends. Then, he started selling locally and online. Finally, he opened up a storefront. While the shop has a variety of non-cookie items for sale, the focus is on the cookies.
Can you imagine? A store dedicated to just cookies? Mind blowing (to me, at least).
I never even thought that was possible. I just assumed that if one was going to own a bakery or sweets shop, it would have to be filled with all sorts of things like cakes, pies, pastries, etc. In other words, lots of things other than cookies. Obviously, that's not the case.
Now, having said that, I'm just gonna put it out there: I want to have a business where I can sell my cookies and ice cream. I'm not sure of what form it will take, maybe it will be an online business, or a catering company, or even a store front. Who knows? But what I do know is that I'm gonna do this.
- Sunshine
Wednesday, March 28, 2012
O.M.G List
Hey all,
I wanted to drop a quick line to let y'all know that I haven't disappeared. Quite the opposite, actually. I went to the FoodBloogForum Conference at Disney World in Orlando over St. Patrick's Day Weekend and I was so inspired. I have so many great ideas for this blog and my other blog, The Culinary Vampire.
There has been some behind the scenes work going on for both of the blogs and I have several posts in the works, including a recap of FoodBlogForum Orlando (which will probably be on The Culinary Vampire).
In the meantime, I wanted to share a link love post with a round up of all the different recipes or interesting things I've found recently. I usually share them as I find them on my personal Facebook page, but I wanted to have them all in one place. I plan on making these posts a somewhat regular feature. What do you think?
I wanted to drop a quick line to let y'all know that I haven't disappeared. Quite the opposite, actually. I went to the FoodBloogForum Conference at Disney World in Orlando over St. Patrick's Day Weekend and I was so inspired. I have so many great ideas for this blog and my other blog, The Culinary Vampire.
![]() |
| Fuzzy picture of almost all of the desserts for the opening reception. |
There has been some behind the scenes work going on for both of the blogs and I have several posts in the works, including a recap of FoodBlogForum Orlando (which will probably be on The Culinary Vampire).
In the meantime, I wanted to share a link love post with a round up of all the different recipes or interesting things I've found recently. I usually share them as I find them on my personal Facebook page, but I wanted to have them all in one place. I plan on making these posts a somewhat regular feature. What do you think?
- Easy, peasy Momofuku Cinnamon Bun Pie from averie cooks using premade cinnamon roll dough. This much easier, dumb-down version is dangerous, people - dan.ger.ous.
- Ice cream sandwiches with candied bacon from livelovepasta. Be still my heart...
- Frito Jets from Bluebonnets and Brownies. Not technically a dessert, but it's salty-sweet, so that counts as dessert in my book.
- Orange roll pull apart bread from Two Tiny Kitchens. I love anything orange.
- These caramel pecan buns from What's Cookin', Chicago kinda make me want to lick my computer screen.
- Crunchy.Biscoff.Spread. Oh Ma Gaw! I have a slight addiction to Biscoff spread.
- Basil simple syrup and honey coriander simple syrup from Design*Sponge. I am thinking these would be great bases for sorbet.
- Dairy free coconut pots de creme from Can't live without... I always delight in finding something that's -free (dairy, gluten, soy, corn, egg, etc.) looks so good that the missing ingredient isn't even noticed.
Tuesday, March 13, 2012
Lemon sorbet
Lemon sorbet...Oh, how I love you so... So delicious, refreshing, and...totally not appropriate for late winter, even if I live in South Florida and it is unseasonably warm.
Ha! As if I were ever concerned with the appropriateness of a frozen treat! And, frankly, neither should you.
I've mentioned before how much I love lemon sorbet. With as much as I adore it, I'm not exactly sure why I've never made it. I managed to score a huge bag of lemons for a sweet price and I knew I wanted to use them for some lemon sorbet. But, who wants to squeeze a huge bag of lemons when all you need is one cup of juice?
[Also, obsessive-compulsive much with the zesting, Sunshine? No, not at all. Of course, I'd be lying if I said I wasn't annoyed that I missed some spots... If you, too, want to be OCD with your zesting, get thee to a microplane zester
However, when a friend mentioned a fierce (like, "Babe, I know it's 2 AM, but can you go to the store and get me some?" - fierce) craving, it was just the push I needed and I jumped on the chance to make some for the both of us.
I followed the recipe from David Lebovitz's book, The Perfect Scoop
The sorbet was almost perfect - just as cool and refreshing, but with a strong kick of lemon, as you'd expect. I say almost because I found the lemon zest to be somewhat of a nuisance, so keep that in mind if you like your sorbet to be super smooth.
Also, how cute are those lemon cups? Awesome thrift store find!
I just love the lighting in the photo above. I took the picture to show y'all that the sorbet freezes kind of wonky. The lighting was bad and I wasn't expecting anything, but instead, I got a wonderful shot.
Monday, March 5, 2012
Berry buttermilk ice cream
I've never understood the hoopla around buttermilk. I've always thought my standard pancakes were quite delicious as is, thankyouverymuch. Anytime I needed to add tang to a recipe, I always used yogurt. However, I made some cranberry buttermilk pancakes sometime last year during the Thankgsgiving Christmas food-fest. They were absolutely delicious; really, everything that the linked post describes them as. Even though I also made some buttermilk biscuits that were somewhat of a fail, I decided that there might be something to this buttermilk thing after all.
The only problem with buttermilk is that it is only sold in quart containers and, yet, most recipes only call for a cup or less. The few times that I have attempted buttermilk anything, almost half the container will go to waste because I can't think of anything else to make. (Although, I have learned that buttermilk can be frozen.)
I didn't want my buttermilk to go to waste, so I coordinated another cranberry buttermilk pancake make (I know, that makes no sense, but just go with it.) with an ice cream recipe that called for buttermilk.
| Doesn't this look like some sort of dinosaur head? |
I did a search on buttermilk ice cream recipes but they either required an entire quart of buttermilk or they only needed 1/4 cup or so. This was not only annoying, but also sooo not helpful because I about 2 cups to work with.
I finally found a recipe that used equal parts buttermilk and cream (which is good because I didn't have any milk). It also called for strawberries, which I had and wanted to use up. After I realized that I needed to double the recipe to make the amount I needed and to use up all of my buttermilk, I decided to add some blueberries that were languishing in the fridge. And that is how berry buttermilk ice cream was born!
Berry Buttermilk Ice Cream
Adapted from StressCake, who adapted it from a David Lebovitz's, The Perfect Scoop
Use any type of berries by themselves or a combination of berries. I imagine that peaches would be wonderful as well.
Makes about 1 quart
Ingredients
3/4 - 1 pound strawberries (hulled, halved if large), and/or other berries
3/4 cup sugar, divided
1 Tablespoon kirsch, chambord, or vodka (optional)
1 cup heavy cream
6 egg yolks
1 cup buttermilk
Directions
Combine the berries, 1/4 cup sugar, and alcohol (if using) in a bowl. Let sit until sugar is dissolved, about 1/2 an hour and up to 24 hours.
While the strawberries are macerating, heat the cream and 1/2 cup sugar in a saucepan over medium heat, until the sugar is dissolved. While that is heating, whisk the egg yolks in another bowl. Using a small ladle, pour a little bit of the hot cream into the yolks, whisking constantly, until you can't ladle anymore. Add the remaining hot cream, whisking constantly. Pour the warmed egg-cream mixture back into the saucepan. Continue heating the mixture over medium heat while stirring constantly with a wooden spoon (or other heatproof utensil), scraping the bottom as you go, until the mixture thickens and coats the spoon (170°F on an instant-read thermometer). Pour the custard through a strainer into a medium bowl.
In a blender, puree the macerated strawberry mixture until smooth. Strain, if desired (I did, because I find blueberry skins unappetizing). Combine the custard mixture and the pureed berries. Chill the mixture thoroughly in the refrigerator, but preferably overnight. Just before churning, add the cup of cold buttermilk and stir to combine. Freeze it in your ice cream maker according to the manufacturer’s instructions.
Monday, February 27, 2012
Strawberries and Cream Bars
Strawberry season is in full swing here in FL. (Coincidentally, today is National Strawberry Day.) As soon as I saw them in the store, I knew I had to make something with them. There is certainly no dearth of strawberry recipes to choose from, which is why I had some trouble settling on just one recipe. I finally picked this one, because even though there are a few steps involved, the preparation is actually rather easy. And it has an added bonus of using up all those extra egg whites from making custard-based ice creams. Plus, I'm a sucker for a frozen whipped cream layer thing; it takes me back to the days of frozen jello-Cool Whip creations from when I was a kid.
Honestly, I wasn't sure about these for the first few bites; the strawberry layer stays kind of hard for a bit and the flavor isn't that pronounced. But after I let the bars stand a few minutes, the strawberry layer softened up and the top layer got nice and creamy - almost mousse-like. When I was cutting a few pieces to take photos of, I kept eating the little slivers of the edges and before I knew it, I had eaten at least the equivalent of 2 pieces worth.
This recipe lends itself to multiple variations. You could certainly change up the berries used; anything with a somewhat tart bite would be good. Along the same lines, a peaches and cream combo (using the slightly tart Georgia peaches) or an orange and cream combo would be wonderful variations. Please let me know if you try any of these combos.
Strawberries and Cream Bars
Adapted from Pip & Ebby, who adapted it from Martha Stewart
I chose not to strain the strawberry seeds as they were quite small, but please do if this is a concern of yours or if you are using berries with larger seeds. Be sure to let the bars stand a few minutes to enjoy them the best.
Ingredients
2 pounds strawberries, hulled, halved if large (6 cups)
1 1/2 cups sugar, divided
Coarse salt (I forgot this)
7 large egg whites, room temperature*
2/3 cup cold heavy cream
1 teaspoon pure vanilla extract
Directions
In a large bowl, combine the strawberries and 3/4 cup sugar. Let macerate until the sugar turns liquid, about 30 minutes or so. Blend until smooth the strawberries and their liquid plus a pinch of salt. Strain, if desired. Either: (1) Pour the mixture into a 9-by-13-inch baking dish. Transfer to freezer and scrape with a fork every 30 minutes until mixture is thick and slushy, 2 hours. Or, (2) freeze the mixture in your ice cream maker according to the manufacturers instructions and then transfer to the baking dish. Smooth top with a rubber spatula.
Notes: This recipe uses raw egg whites; if you're concerned about that, replace with pasteurized egg whites, which can be found in the dairy aisle. (Although, I'm not sure if they'll whip up nicely, so decide what's important to you.)
Monday, February 20, 2012
Rice pudding ice cream
I was a picky eater as a child. Anything that was exotic would always get passed over. I'd only eat plain, bland foods and desserts. My pickiness carried over to most of the foods my Puerto Rican grandmother cooked. I could throw down with some of her fried pork chops (chuletas), beef stew (carne guisada), and rice (but no beans, please). But, no way was I going anywhere near the fried plantains (tostones), cassava (yuca), tamales, and, especially, rice pudding with offending raisins (arroz con leche or arroz con dulce). I know, for shame...
I have finally stepped out of my picky shell and am definitely making up for lost time! While I still won't go anywhere near those tamales, I love me some rice pudding. I only make it once a year or so because I do it up old school style, which means standing in front of the stove, stirring, for hours. I prefer my rice pudding fairly simple with only a generous sprinkle of cinnamon. Oh, and I add raisins now. Tara, on the other hand, likes it plain. Oh, the irony...
When I saw a recipe for rice pudding ice cream from clumsycookie, I knew I had to get on it. I mean, can you imagine, rice pudding in ice cream form?! I won't be sharing a rice pudding recipe with you today because: Hello? Hours at the stove is just not cute right now. Use your tried and true version or, do like I did and use some Kozy Shack rice pudding and doctor it up as you like. The ingredients are fairly minimal and what you'd expect in a homemade rice pudding. You know, things like rice, milk, eggs, and sugar.
Unfortunately, rice pudding seems to be better as rice pudding rather than rice pudding ice cream. It might have been because I left it plain and didn't add anything to the store-bought stuff. So definitely make your rice pudding how you like it flavored and then amp up the flavors a bit, otherwise it will be rather bland...
Rice Pudding Ice Cream
Barely adapted from Clumbsy Cookie
If you don't have glucose or corn syrup, you can substitute with 4 tablespoons of regular sugar. I have not tried this, so let me know how it works if you do.
Ingredients
1 cup milk
3 tablespoons glucose or corn syrup
2 cups rice pudding
Optional add-ins (if using store-bought rice pudding):
1+ teaspoon cinnamon
1/2 cup raisins soaked in rum or vodka
Directions
Mix the milk and glucose (or corn syrup or sugar) and heat just to dissolve the glucose. Combine with the rice pudding and cinnamon, if using, in a blender and mix until you have a thick liquid (you could also use an immersion blender). Strain to separate any unblended rice grains (these are quite tasty - like a sweet rice cereal). Cool completely and churn in your ice cream maker according to the manufacturers instructions. Mix in the raisins, if using, just before you transfer the ice cream into a container to freeze.
Monday, February 13, 2012
Shortbread
I recently discovered shortbread (I know, what rock have I been living under?) and only because I was looking for prepared cookies with minimal ingredients and none of the "bad" stuff like high-fructose corn syrup, soybean oil, emulsifiers, etc. I am always intrigued at how they can taste so good. And their texture is amazing - they're soft without being too soft and chewy like a traditional cookie, but they also have a slight snap and, yet, aren't crispy. To satisfy my fix, I buy Walker's Shortbread, but they're kind of expensive. While they're worth the price, I knew that I could make some at home for much cheaper.
These shortbread cookies have all of 3 ingredients: flour, sugar, and butter. You almost can't go wrong with these. That said, the first time I attempted shortbread cookies, they tasted really good, but they spread all over the baking sheet. I was still very much a beginner baker at the time and thought that the problem was with the recipe or that the simplicity of the recipe belied some serious skills needed. Turns out, the dough just needed to be chilled. Lesson learned.
I originally wanted to dress them up by dipping the ends in white chocolate and then covering that with some chopped pistachios, but the results were rather disappointing and boring. All the individual flavors were lost. So, word to the wise, these are best enjoyed plain.
Shortbread
Barely adapted from Better Homes & Gardens, 75th Anniversary Ed.
I used regular grocery store butter, but I bet that some fancy butter would really shine in this recipe.
Ingredients
1 1/4 cups all-purpose flour
3 tablespoons granulate sugar
1/2 cup butter, cold*
Directions
Combine flour and sugar in a bowl or food processor. If mixing by hand, cut in butter using a pastry blender or two forks. If using a food processor, add the butter and pulse. Whatever method you use, combine ingredients until mixture resembles fine crumbs and starts to stick together a bit. Form the mixture into a ball and knead until smooth.
On a lightly floured surface, roll the dough into an 8x6-inch rectangle (Get out that ruler to be completely accurate!) that is about 1/2-inch thick. Using a knife or dough scraper, cut the dough into 24 2x1-inch strips. Place 1 inch apart on an ungreased baking sheet. If desired, make the "design" on the cookies by gently pressing the flat end of a wooden skewer or a fork into the dough, taking care not to press all the way through the dough.
If your kitchen or dough is particularly warm, a short 20-30 min chill in the fridge or freezer is super helpful and will make sure that your cookies retain their shape. (I like to put my dough in the fridge, then turn on the oven to preheat. When the oven is ready, I'll pop the baking sheets straight from the fridge into the oven.)
Preheat oven to 325F. Bake for 20-25 minutes or until the cookies turn a very light brown.
Notes: When the type of butter isn't specified, I usually use a mix of salted and unsalted.
Tuesday, January 17, 2012
Chocolate ice cream
Confession: I generally dislike most chocolate desserts.
Of course, now you all are looking at me like I'm some sort of weird, possibly non-human, definitely non-female thing.
Honestly, I have no big explanation; it just doesn't do anything for me. Rarely will I pick up a chocolate creation as my first, or even second, choice for a dessert item. There are a few chocolate desserts that I will eat without hesitation like chocolate chip cookies (because, well, they're chocolate chip cookies) and fudgey (but never cakey and always without mix-ins, thankyouverymuch) brownies.
There are things I won't touch no matter how desperate I am, like fudge and dark chocolate.
Everything else pretty much falls into the "only if I'm really craving something sweet and there is absolutely no alternative" category. Chocolate ice cream usually falls into this group.
You may be wondering then, why I decided to make a chocolate ice cream to showcase on the blog. Well, Tara asked and I'm always up for a challenge. That said, I was still a little hesitant to make it, but I figured that if I didn't like it, I would certainly be able to give it away to someone. Plus, I had planned to make it for Christmas and pair it with some peppermint meringues (and we all see how that went...)
David Lebovitz, who I got this recipe from, says this is his ultimate chocolate homemade ice cream. I can certainly see why, as it just may nudge chocolate ice cream into something I like...on purpose. In other words, if I, a non-chocolate lover, like this, you should jump on it!
Chocolate Ice Cream
from David Lebovitz’s The Perfect Scoop
A note about the cocoa powder. Don't stress if you only have regular (unsweetened cocoa powder); I wasn't able to find any Dutch-processed cocoa powder anywhere and didn't want to order any online. I'm sure it affects the flavor a bit - I thought it was a smidge acidic - but it's still quite delicious.
Ingredients
2 cups (500 mL) heavy cream, divided
3 tablespoons (21 g) unsweetened Dutch-process cocoa powder
5 ounces (140 g) bittersweet or semisweet chocolate, chopped
1 cup (250 mL) whole milk
¾ cup (150 g) granulated sugar
Pinch of salt
5 large egg yolks
½ teaspoon vanilla extract
Directions
Bring 1 cup (250 mL) of the cream and cocoa powder to a boil, whisking to fully incorporate the cocoa while heating. Immediately reduce the heat and simmer for 30 seconds, whisking constantly. Remove from the heat and stir in the chopped chocolate until smooth. Stir in the rest of the cream. Pour the liquid into a bowl, making sure to scrape all of that chocolatey goodness out (Did I just say that?!). Place a mesh strainer on top of the bowl.
Heat the milk, sugar, and salt in the same saucepan you used above. While that is heating, whisk the egg yolks in another bowl. Temper the egg yolks by slowly pouring the warm milk mixture into the egg yolks, whisking constantly. (I like to do this a bit slower by pouring some of the liquid into the eggs by the ladle-full about 2-3 times and then pouring the rest of the milk mixture into the bowl.) Pour the warm egg-milk mixture back into the saucepan.
Continue heating the mixture over medium heat while stirring constantly with a wooden spoon (or other heatproof utensil), scraping the bottom as you go, until the mixture thickens and coats the spoon (170°F on an instant-read thermometer). Pour the custard through the strainer and stir it into the chocolate mixture until fully incorporated, then stir in the vanilla.
Chill the mixture thoroughly in the refrigerator, preferably overnight, then freeze it in your ice cream maker according to the manufacturer’s instructions.
Thursday, January 12, 2012
Nutmeg Ice Cream
I made this ice cream before Christmas to accompany the Eggnog cookies. Unfortunately, their flavor profiles were so similar, that there wasn't much of a difference in how they tasted. I had to mentally smack myself in the forehead for thinking that nutmeg custard (read: egg-based) ice cream would be much different from eggnog cookies with nutmeg.
Oh well, you live and learn, right?
In any event, I liked the ice cream well enough, but felt that it needed more flavor. The nutmeg flavor just wasn't strong enough. The nutmeg only imparted a light, oddly floral note that is almost lost in the richness of the custard base. This has got to be due to the extremely short steeping time. When I was reviewing the recipe, I thought it was odd that it called for steeping the nutmeg for only 10 minutes. Any other recipe I've seen that requires steeping says to do so for about an hour. I've adjusted the time in the recipe, but know that I didn't actually steep for that long, so maybe check your base at 30 minutes or so.
Final bit of advice: normally, I suggest an overnight chill in the fridge for custard bases, but here, it is required. It's absolutely crucial to developing the full flavor of the nutmeg.
Yield: About 1 Quart
To easily crack the nutmeg, either use a nutcracker or place the nutmeg in a plastic bag and smash it with a hammer or a rolling pin. Don't just bang it with your rolling pin on the counter because the nutmeg will shatter everywhere, not that I did any such thing (ahem).
Ingredients
2 cups half-and-half
1 whole nutmeg, cracked
2 tsp. freshly grated nutmeg
3/4 cup sugar
3/4 cup sugar
6 egg yolks
1 cup heavy cream
Directions
Heat half-and-half and cracked nutmeg in a 4-qt. saucepan until it just begins to simmer. Remove from heat; let steep for 10 minutes (at least - see liner notes above).
While the cracked nutmeg is steeping, toast grated nutmeg in a skillet over medium heat, 1–2 minutes. (This is optional. It adds a somewhat floral essence to the nutmeg.) Remove pan from heat; set aside.
In a bowl, whisk together sugar and yolks. Then, still whisking, slowly pour in half-and-half mixture. Return mixture to pan; cook, stirring, until mixture thickens, 8–10 minutes. Pour through a fine strainer into a large bowl or measuring cup (which is what I always do). Whisk in toasted nutmeg and cream; cover custard and chill in the fridge overnight.
Freeze custard according to manufacturers instructions.
Monday, January 9, 2012
Eggnog cookies
I know, I know! The holidays are over and here I am posting not only a cookie recipe, but an eggnog cookie recipe. I have some nerve don't I? Well, hello, this is a dessert blog. Surely you expected nothing less...
In my defense, I made these before Christmas and am just now getting around to posting. However, there is always room for cookies and my local stores still have eggnog stocked so you still have time. Otherwise, you can tuck this recipe away until eggnog season rolls around again...
On their own, these cookies are essentially a sugar cookie with an eggnog aftertaste. The eggnog flavor kind of sneaks up on you after you've taken a few chews. The icing definitely brings the eggnog flavor. They are exactly what you, or at least what I, want in a sugar cookie: slightly crispy on the edges and soft and chewy in the middle. I particularly liked how they got chewier each day.
A note about piping the icing, despite how cool the pictures of the iced cookies look, I would definitely change my technique if I make these cookies again. First, I used a plastic baggie and cut the opening too big. Smaller is better here, folks. Second, I should have separated the cookies before the icing set/dried because I had all these little tails of icing hanging off the cookies once I separated them. (It was actually kind of cute. And the dogs appreciated when the little pieces kept falling on the floor. You know, on accident...ahem...) Finally, in light of the icing tails, it might have been easier, and definitely would have been prettier, to do swirls on all the cookies.
Iced eggnog cookies
Adapted from Cookie Madness
Yield: 6 dozen small cookies; 1.5 cups icing
Ingredients
Cookie dough
2 1/4 cups flour
1 teaspoon baking powder
1/2 teaspoon cinnamon
1 teaspoon freshly grated nutmeg (or 1/2 teaspoon pre-ground)
1 1/4 cups sugar
3/4 cup SALTED butter, room temp
1/2 cup eggnog
1 teaspoon vanilla
2 egg yolks
1 tablespoon nutmeg (optional)*
Eggnog icing
3 C. confectioners’ sugar
1/4 C. softened butter
1/3 C. commercial eggnog (use as much as you need)
Directions
Preheat oven to 300F.
In a medium bowl combine flour, baking powder, cinnamon and nutmeg; mix well with a wire whisk and set aside.
In a large bowl, cream sugar and butter with an electric mixer. Add eggnog, vanilla and egg yolks and beat at medium speed until smooth. Add the dry ingredients and beat at low speed just until combined.
Drop by rounded teaspoons onto ungreased baking sheets, 1″ apart. Sprinkle lightly with nutmeg or skip this step and sprinkle on the nutmeg after you ice the cookies. Bake for 23-25 minutes or until bottoms turn light brown.
While the cookies are baking, make the icing: In small mixer bowl, beat confectioners’ sugar and butter until well blended. Gradually beat in eggnog until icing is smooth.
Transfer to cool, flat surface immediately with spatula. Ice the cookies after they are completely cool.
*Note:
I didn't top the cookies with nutmeg because I was intending to pair them with nutmeg ice cream and I didn't want the flavor to over power everything. However, if you're eating them on their own, the nutmeg topping is highly recommended.
Thursday, December 29, 2011
Champagne sorbet
I always forget how much I like sorbet. I can almost remember the first time I had a lemon sorbet; at the time, I thought it was the best frozen thing I had ever tasted. For a while, it was the only thing I would order when I went to an ice cream parlor. But...I hate to be boring and predictable so I stopped ordering it. (Although, I must say, with as much of an ice cream snob as I am, I really should stick to ordering sorbets and/or sherbets when I'm out...)
When I'm contemplating what fabulous frozen concoction I'm going to make next, sorbet is so easy to overlook. I mean, at it's core, sorbet is basically made from sweetened water flavored with fruit or some sort of alcohol (y'know, like champagne...), among other things; it just seems so...plain. And with all the different flavors of ice cream just calling my name to be made , how could I not push sorbet to the back of the line? But in its simplicity lies an understated elegance that lets the flavors shine through clean and clear. There's no eggs or dairy to dilute the flavor.
This champagne sorbet is no exception. At it's very core, it is an elegant dessert. Yet, it's not very fussy. There are only 4 ingredients and it's fairly simple to make. You do need a bit of advanced planning in that you have to make the simple syrup and have it (and the champagne - can't forget that) chilled before you can freeze the mixture in the ice cream machine. But even that isn't too hard. I made mine one night, stuck it in the fridge along with the champagne, and then processed the sorbet the next day.
One last point in favor of making this sorbet. Because it's made with champagne and has alcohol, it doesn't freeze super solid. It's absolutely perfect for New Year's party prep because you can make it ahead of time and not have to worry about it being a solid block of frozen sorbet.
I'm sure this can be made alcohol free, using an appropriate substitute, but I haven't tried it. Let me know if you do.
Champagne Sorbet
Adapted from Ice Cream Ireland
Makes about 1 quart
Ingredients
330 gr (~ 1 3/8 cup) sugar
500 ml (~2 1/8 cup) water
250 ml (~1 cup) Champagne
75-100 ml (1/4 - 1/3 cup) lemon juice*
Directions
Bring sugar and water to boil the water and stir in the sugar, until it is completely dissolved. Cool completely. Stir in the champagne and just enough lemon to offset the sweetness. Freeze according to your manufacturer's instructions.
Serve it in champagne glasses garnished with strawberries. Or, if you want to be extra fancy, put a small scoop in a champagne flute and then top it off with champagne and garnish with strawberries.
*Note:
Go easy on the lemon, but also don't be afraid of it. Taste as you go, and make sure it doesn’t overpower the champagne. I initially added about 2 tablespoons. I had to process my sorbet in two batches. After the first batch came out, I added a smidge more (maybe 2 teaspoons) and I was much happier with the overall flavor.
Wednesday, December 7, 2011
Pumpkin cheesecake ice cream and pumpkin pillow cheesecake cookies
Pumpkin season may technically be over for us foodies, but I bet you still have a few cans of pumpkin in your cabinet. No? Just me?
Well, you should definitely go pick up a can for these recipes because they are definitely worth it.
The pumpkin cheesecake ice cream is rich, but not too rich, and surprisingly smooth and creamy despite not having any egg yolks. There's a small kick of lemon that is just enough to cut the sweetness from being too sweet.
The main event here, though, is the cookies. They could best be described as little pillows of pumpkin cookie with cheesecake stuffed inside. The cookies are definitely labor intensive, but the steps are relatively simple and easy. However, don't let that stop you as everyone who has tasted them says they are the best cookie they have ever had.
| I love the lighting on the edges of the top cookie. |
Pumpkin cheesecake ice cream
adapted from Desserts for Breakfast, who adapted it from David Lebovitz's The Perfect Scoop
I like my cheesecake bit on the lemon-ier side and I'm not a fan of super aggressively spiced things, so I went light on the spices here. Feel free to increase the spices to your preference.
Makes about 1 quart
Ingredients
7 oz cream cheese
3 oz (approximately 1/3 cup) pumpkin puree
zest of 1 lemon*
1 cup sour cream
1/4 cup whole milk
1/4 cup heavy cream
2/3 cup sugar
pinch of salt
1 teaspoon ground cinnamon*
1/2 teaspoon ground ginger
1/4 teaspoon freshly grated nutmeg
1/4 teaspoon allspice
Directions
Place all ingredients in a food processor and blend until smooth. Chill mixture thoroughly in the fridge, then freeze it in your ice cream maker of choice.
*Notes:
1. I didn't have lemon zest, so I used 3/16 teaspoon of lemon oil. Lemon extract could be used, as well.
2. Or use 2 teaspoons of pumpkin spice to replace all the spices.
| Not the best lighting, but one of the better pictures of the filling. |
Pumpkin pillow cookies with cheesecake filling
adapted from Oatmeal Cookie and Libby's via VeryBestBaking
Many thanks to my baking buddy, Eliz, for recipe testing and help with the "stuffing" method.
These cookies taste just like pumpkin cheesecake! Again, you can taste the spices, but they are mild. If you find that you like things to taste more pumpkin-y, then definitely increase the spices.
Ingredients
Filling
4 oz cream cheese, room temperature
2 tablespoons sugar
1 teaspoon vanilla extract
Cookie dough
2 1/2 cups all-purpose flour
1 teaspoon baking soda
1 teaspoon baking powder
1 teaspoon ground cinnamon*
1/2 teaspoon ground ginger
1/4 teaspoon freshly grated nutmeg
1/4 teaspoon allspice
1/2 teaspoon salt
1 1/2 cups granulated sugar
1/2 cup butter (1 stick), softened
1 cup pumpkin puree
1 large egg
1 teaspoon vanilla extract
Directions
Add the filling ingredients to a small bowl and mix well. Let the mixture chill in the refrigerator until ready to assemble.
Combine flour, baking soda, baking powder, spices, and salt in medium bowl. Beat sugar and butter in large mixer bowl until well blended. Beat in pumpkin, egg and vanilla extract until smooth. Gradually beat in flour mixture. Once dough is mixed, chill in the fridge for about 20-30 minutes.
Just before you take the dough out of the fridge, preheat oven to 350° F. Grease cookie sheets or line with parchment paper (which is what I did).
To form the cookies: Place 1 tablespoon of dough on the cookie sheet. Make an indent in the middle and add 1/2 to 1 teaspoon of filling. Place another tablespoon of dough on top. Seal the edges as necessary and roll into balls. Put the stuffed dough balls in the freezer for 5 minutes to firm up.
Place the chilled dough balls about 2 inches apart on the prepared cookie sheets. Bake for 18 to 20 minutes or until edges are firm. Cool on baking sheets for 2 minutes; remove to wire racks to cool completely.
Wednesday, November 30, 2011
Cranberry sauce ice cream and cookies
For my first ice cream and cookie pairing, I wanted to use the seasonally appropriate cranberry. I love eating cranberry sauce, but there is always some left over and I just can't manage to eat more than a few tablespoons at a time. The following recipes don't use a lot of sauce, but they will use up that little bit extra you have.
Oh, and I fully intended on putting white chocolate in both recipes, but I totally forgot. I'm including it, anyway, as an option because I think it would enhance both recipes. If you experiment with using the white chocolate, please report back.
A final note before I get to the recipes, I like whole berry cranberry sauce, but the skins were a bit annoying in the ice cream. (I also don't like cherry ice cream for that reason.) They weren't an issue with the cookies. Your mileage may vary, so if you are funny about food textures like I am, feel free to strain out the skins in your sauce.
Cranberry sauce ice cream
adapted from O Pistachio, who adapted it from Simon Hopkinson's Week In Week Out
Regarding the sugar amount, cranberry sauces differ in their sweetness levels, so take the amount listed as a guideline and add it in a tablespoon or 2 at a time, tasting as you go.
Makes about 1 quart
Ingredients
1 1/3 + cup (300ml) full fat milk
1/2 vanilla bean, split lengthways (or 1/2 tsp vanilla bean paste or extract)
4 egg yolks
1 cup + 2 tsp (250ml) heavy whipping cream
1/2 - 3/4 cup (150-175g) cranberry sauce
6 tablespoons sugar, approximately
4 oz white chocolate chips or chunks, optional
Directions
Pour the milk into a small saucepan. Scrape the seeds from the vanilla bean into the milk with a paring knife, then add the bean pod to the milk. Gently heat until it comes to a boil, whisking occasionally to disperse the vanilla seeds into the milk. Cover, remove from heat, and let stand for at least 20 minutes.
Beat the egg yolks with a fork in a small bowl and then mix in a little of the milk. Transfer the yolk-milk mix into the saucepan. Cook over a gentle heat, constantly stirring, until the mixture has lightly thickened - do not allow it to boil! (However, if you do, immediately remove from heat and either blend with an immersion blender or strain the mixture to remove the eggy bits.)
Refrigerate the mixture to cool for at least a few hours, but preferably overnight.
Remove the vanilla bean and whisk in the cream and jam. Freeze in your ice cream maker according to the manufacturer's instructions.
Cranberry Sauce Cookies
Adapted from Joy the Baker
These cookies are pretty light and are, according to Tara, the most delicious cookies ever! Feel free to substitute any other type of jam for the cranberry sauce.
Yield: Approximately 24 cookies (I totally forgot to note how many I got, but 24 sounds about right.)
Ingredients
2 cups all-purpose flour
1 teaspoon baking powder
1/2 teaspoon ground ginger
1/4 teaspoon salt
1 stick (8 tablespoons) unsalted butter, at room temperature
2/3 cups sugar
1 egg
1/2 teaspoon vanilla extract
6 tablespoons (1/4 cup + 2 Tb) cranberry sauce
1 cups white chocolate chips, optional
Directions
Position the racks to divide the oven into thirds and preheat the oven to 375 degrees F. Line two baking sheets with parchment.
Whisk together the flour, baking powder, ginger and salt.
In a large bowl or stand mixer, beat the butter on medium speed until creamy and smooth. Add the sugar and beat for a minute. Add the egg and vanilla and beat for 2 minutes more. The mixture will be satiny. Reduce the mixer speed to low, add the jam and beat for 1 minute more. With the mixer still on low add the dry ingredients and mix only until they are incorporated. You’ll have a very thick dough.
Spoon the dough by the rounded teaspoonfuls into a dish of granulated sugar. Toss to coat and place on a baking sheet, leaving about an inch between the mounds.
Bake the cookies for 10 to 12 minutes, rotating the pans from top to bottom and front to back at the midway point. The cookies will be only just firm, fairly pale and browned around the edges. Pull the sheets from the oven and allow the cookies to rest for 1 minute, the carefully transfer them to racks to cool to room temperature.
If necessary, repeat with the remainder of the dough, cooling the baking sheets between batches.
Subscribe to:
Posts (Atom)